Sunday, April 14, 2013
Reading magstripe data from a MagTek reader using an Arduino
I got my hands on a used MagTek card reader from a surplus electronics shop recently and was able to get an Arduino to read from it. I mostly built my project off of and owe thanks to this Instructable which I highly recommend reading if you want to get a decent understanding of how magstripes work and how to interface with a reader using an AVR. Another great reference that goes into full detail on magstripes can be found here. Some differences with my project are that it uses Arduino code instead of AVR and the code can read off of track 1 or track 2 requiring just a single character code change to switch from one to the other. I also added an LED light to indicate when it's reading a card.
You can download the Arduino code here.
Thursday, August 9, 2012
The DEFCON 20 Badge
It's been quite a long while since my last update but I have been busy studying and practicing at software reverse engineering, particularly with malware. My latest project on that front has been analyzing a Poison Ivy RAT variant used in a targeted attack last year. It's been a lot of fun and a great learning experience that I plan to share here once I feel I am done with it. Until then, I wanted to share the experience and fun I had playing with this year's DEFCON badge. For those who are not familiar, DEFCON is the world's largest and longest running hacking conference that is held annually in Las Vegas typically during the hottest week of the summer. It's a lot of fun and I highly recommend checking it out. For the last few years anyways, they have had a highly involved mystery/puzzle contest that involves the badge you wear to get into the conference. Often times the badges are electronic and part of the puzzle involves hacking them in some way or another. I've never gone too far into the entire puzzle, but I do enjoy playing with the badge and seeing what's in it.
This year's badge is basically a Parallax Propeller development board. I have never played with a Propeller before and I have to say I quite enjoyed it. To learn more about the badge from Parallax and also to find the tools and resources used to read and write the raw EEPROM data, check out this forum post. Here is a picture of a human badge.

And here is a picture of my badge with the VGA and PS2 ports that came with it soldered on.

After dumping the EEPROM off the DEFCON badge, you can see some strings near the beginning.

The strings are referencing all the different badge types: human (for regular attendees), vendor, speaker, uber, etc. The uber badge is very special in that it can only be awarded and earning one takes a lot of effort. If you get your hands on one, you have free admission to DEFCON for life! Looking further down in the strings, a URL is referenced. Visiting that URL brings you to this page that reveals further hints about the mystery/puzzle.


Looking at the schematics of the badge that were provided on the DEFCON DVD, I saw that an IR receiver and transmitter were included. For those who don't know, IR is infrared, the technology used by your TV remote to talk to your TV. After reading the serial output from the badge and spending some time at the conference, it became clear that part of the puzzle involved having different badge types "talk" to each other using IR.

I decided to save an image of the badge code and data before and after scanning another badge and then comparing them to see if I can find where the data is stored that keeps track of scanned badge types.

As you can see there is a large range of FF bytes followed by a large range of 00 bytes and right where these ranges meet, there is one byte that was changed from 00 to FF. After some experimentation, I found that flipping the contiguous bytes from 00 to FF marked the other badge types as scanned.

After that, I decided to see if I can change the badge type code that my badge was transmitting. The DEFCON DVD also includes library code used by the badge including the IR code. It turns out the DEFCON badges are using the Sony IR protocol (SIRCS). I wrote a simple program that merely waits for any incoming SIRCS communication and prints it out to the serial terminal. It was easy enough to ask a friend to let me see what his human badge code was. After that, I asked a Goon (DEFCON volunteers who keep things running smoothly) if I could scan his badge and he was happy to oblige. After looking at these two badge codes, I realized that they were 6 apart which happens to be the same number of badge types apart they are on the serial display output and in the EEPROM bytes. I figured it likely that the other badge type codes would follow this pattern and wrote a SIRCS transmitter program for my badge that simply repeats sending out the different badge codes. This confirmed my theory and also confirmed rumors I had heard that the Goon and Uber badges will actually put your badge out of commission for some amount of time. The badge will blink with a different funky pattern and you will not be able to read it out to the serial terminal or scan other badges.
I found that the timer for the lockout period is stored in a WORD (little endian) shortly below the scanned badge bytes.

Since I was having fun with the IR components on the badge, I thought it would be cool to get my badge to interact with my TV and remote at home. However, I have Samsung TVs which use a different protocol than SIRCS. There was not much available on the internet for the Samsung protocol but I did find one great article here. After a few hours of studying the Propeller programming language SPIN and its assembly counterpart, PASM, I was able to modify the SIRCS code provided by DEFCON to create new libraries that can send and receive using the Samsung IR protocol. For anyone interested, you can download the code here. Here is a demo program that lets me toggle the LEDs on my badge using my TV remote.
I also wrote a demo program that causes my badge to repeatedly transmit the "ON" button code for Samsung TVs.
Lastly, I wrote a program just to play with the LEDs.
Friday, July 22, 2011
Sensing color with the ADJD-S371 + Arduino
So it's been awhile since the last update to this blog. I've been busy with other hobbies and studies that aren't as much fun to make videos for. Anyways, in my last purchase from SparkFun I randomly bought a color sensor. I didn't really have any plans for this sensor, I just bought it cus its cool. It senses color! After some quick thinking, I decided to make a simple demo app to utilize it. It's just a dialog window that sets its background color according to the RGB values returned from the sensor. It's far from perfect, but it's definitely working. It tends to lean too much on the blue channel though. With some adjustments in the code, this could be corrected. The sensor uses I2C, so it's not a simple task to talk to it, but this tutorial made it much easier.
Tuesday, December 21, 2010
Armstrong the Robot Arm
After many failures, breaking wood, melting wires, and other disasters, I finally have a somewhat working robot arm. Built from balsa wood like his brother Woodrow, Armstrong uses 6 servo motors providing 4 degrees of freedom. He has a shoulder, elbow, wrist, and claws. Many of my failures were due to making his arm too long for the shoulder servo to support the weight and also using thin wood that cracked too easily. Even now, this working model feels like it could give up on me at any moment. I think the shoulder servo just isn't strong enough to properly support the weight of 4 other servos using the lengths of wood I used. But, nonetheless, he is working for now and it's been a long time since I've made an update here so I decided it's time for a video. In the future, I may consider rebuilding him, making his arms even shorter and providing more room to hide the electrical components so he doesn't look so messy.
**UPDATE**
I have uploaded the code for those who are interested in this project. The usual disclaimer is applied here, all of my arduino code is quite messy :)
Download link


**UPDATE**
I have uploaded the code for those who are interested in this project. The usual disclaimer is applied here, all of my arduino code is quite messy :)
Download link


Friday, November 12, 2010
Woodrow, In Control
I hooked up the Wii nunchuck to Woodrow so I can control him now. He can move forward or backward, and can turn in place left or right. I'm still in the process of tuning his walk. During my testing, the poor guy broke a leg and I had to patch him up. I may consider adding some sensors to him and make him autonomous. I'm also considering starting a new project, a robotic arm built with balsa wood and servos. Not sure what will come next quite yet.
Monday, November 1, 2010
Woodrow Making Strides
After some testing and code tweaking, I was able to get Woodrow to walk forward without falling over. He still needs some work to walk straighter, but progress has been made. Since this video, I've also added control with the Wii nunchuck and started working on turning and backing up. More videos to come once that's all worked out.
Thursday, October 28, 2010
Woodrow's First Steps
Growing bored of working with wheels, I decided my next robot project should be a biped. This is much more challenging, but also much cooler. I started looking at different robot kits online and quickly came to the conclusion that they're all really expensive, like hundreds of dollars of expensive.. The one I liked most as a starter project was Lynxmotion's BRAT Jr. 
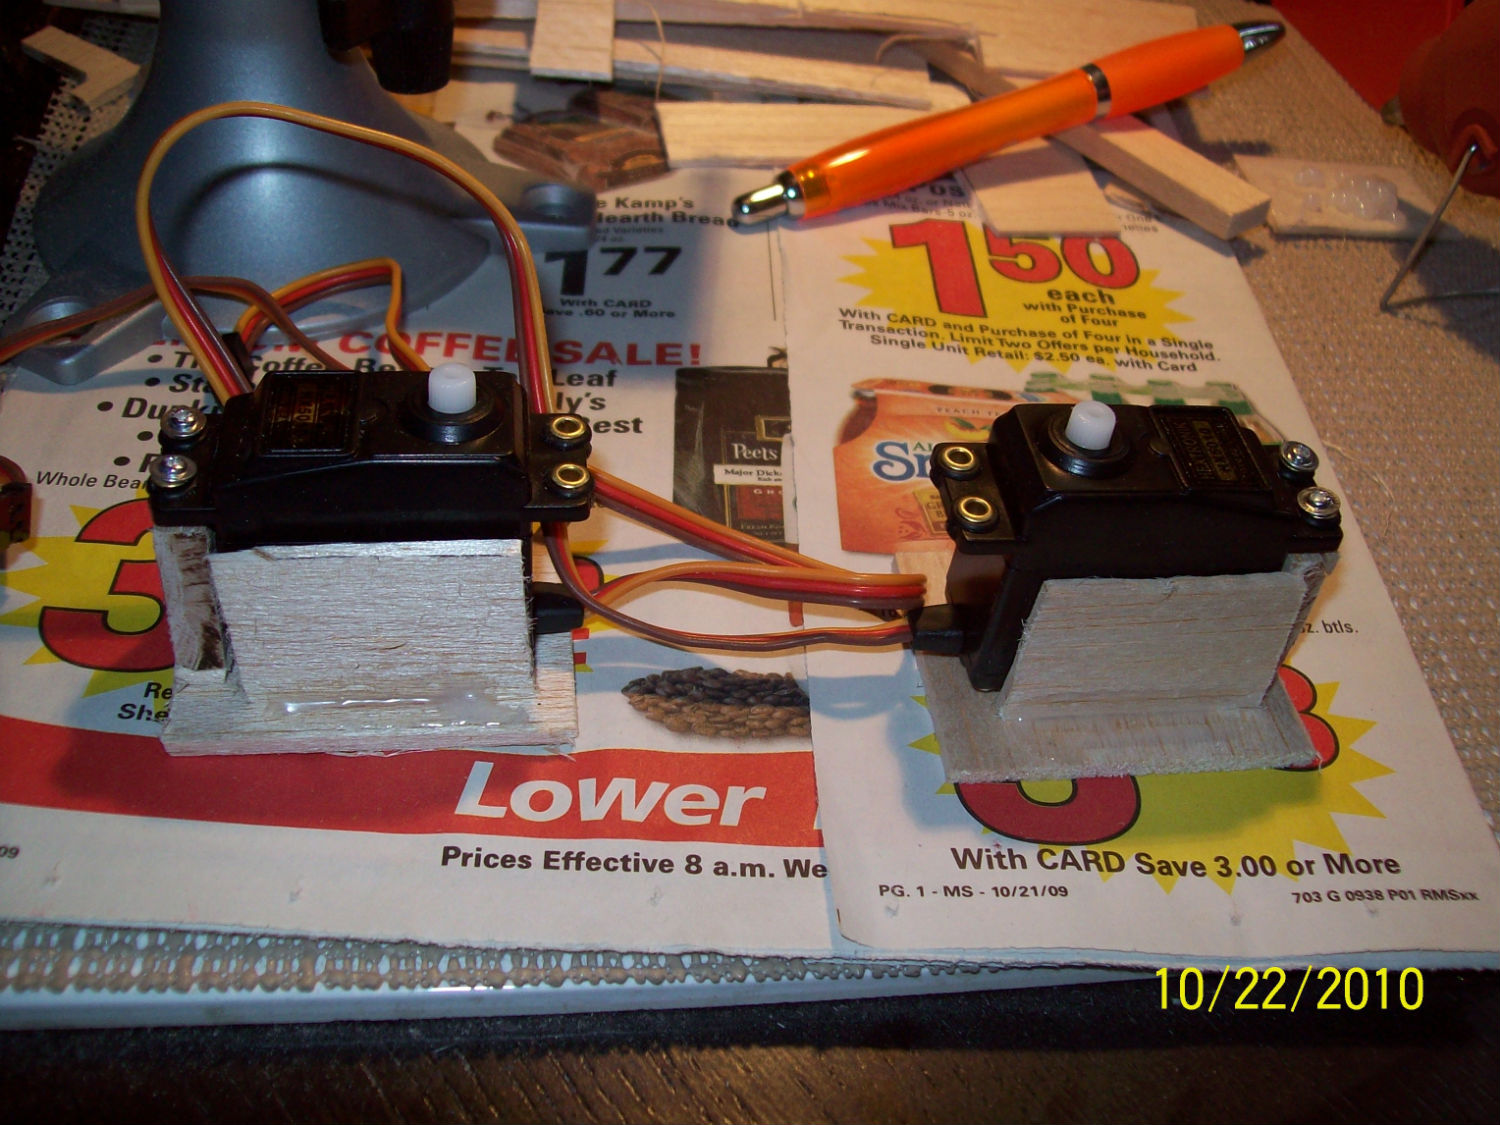
They no longer sell the Jr though, and the regular BRAT costs a little over $300 bucks for the full kit, and still $200 just for the motors and hardware without the microcontroller and board. It comes with 6 servos that go for around $12 bucks each, so if you were to remove the costs of the servos, that's still over $100 bucks just for the metal and screws! I just feel like that's a rip off and didn't feel like buying the kit (at least not for now..). I decided that I would try to build my own replica of the BRAT Jr. using my arduino for the brains and cheapo balsa wood and hot glue. Not only is it a lot cheaper, but it looks pretty cool to have a wooden robot. Here are some pics of the building process, keep in mind this is my first time ever doing anything like this..


It's definitely far from perfect, but it's a good start. I built a basic walking program from scratch and after a little tweaking, I am able to get him to move forward successfully, though quite awkwardly. It's ok, he's just learning how to walk and will hopefully improve with time and practice (and me fixing the code and adjusting the body).
Subscribe to:
Posts (Atom)