So it's been awhile since the last update to this blog. I've been busy with other hobbies and studies that aren't as much fun to make videos for. Anyways, in my last purchase from SparkFun I randomly bought a color sensor. I didn't really have any plans for this sensor, I just bought it cus its cool. It senses color! After some quick thinking, I decided to make a simple demo app to utilize it. It's just a dialog window that sets its background color according to the RGB values returned from the sensor. It's far from perfect, but it's definitely working. It tends to lean too much on the blue channel though. With some adjustments in the code, this could be corrected. The sensor uses I2C, so it's not a simple task to talk to it, but this tutorial made it much easier.
Friday, July 22, 2011
Tuesday, December 21, 2010
Armstrong the Robot Arm
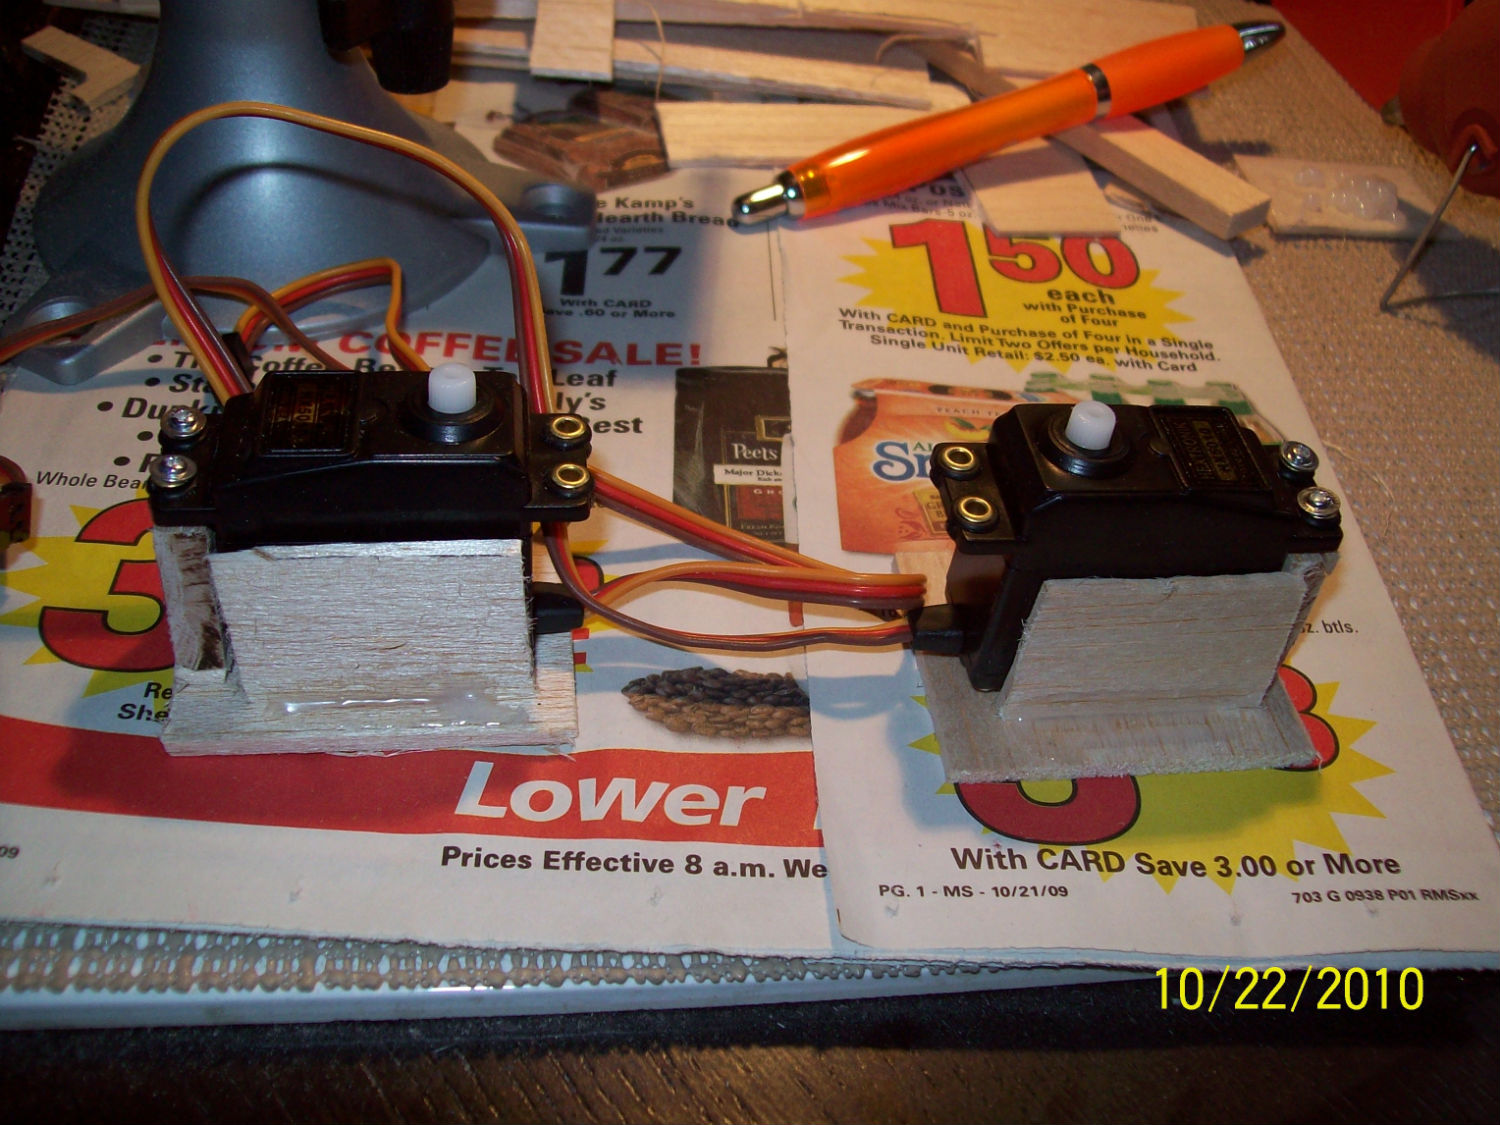
After many failures, breaking wood, melting wires, and other disasters, I finally have a somewhat working robot arm. Built from balsa wood like his brother Woodrow, Armstrong uses 6 servo motors providing 4 degrees of freedom. He has a shoulder, elbow, wrist, and claws. Many of my failures were due to making his arm too long for the shoulder servo to support the weight and also using thin wood that cracked too easily. Even now, this working model feels like it could give up on me at any moment. I think the shoulder servo just isn't strong enough to properly support the weight of 4 other servos using the lengths of wood I used. But, nonetheless, he is working for now and it's been a long time since I've made an update here so I decided it's time for a video. In the future, I may consider rebuilding him, making his arms even shorter and providing more room to hide the electrical components so he doesn't look so messy.
**UPDATE**
I have uploaded the code for those who are interested in this project. The usual disclaimer is applied here, all of my arduino code is quite messy :)
Download link


**UPDATE**
I have uploaded the code for those who are interested in this project. The usual disclaimer is applied here, all of my arduino code is quite messy :)
Download link


Friday, November 12, 2010
Woodrow, In Control
I hooked up the Wii nunchuck to Woodrow so I can control him now. He can move forward or backward, and can turn in place left or right. I'm still in the process of tuning his walk. During my testing, the poor guy broke a leg and I had to patch him up. I may consider adding some sensors to him and make him autonomous. I'm also considering starting a new project, a robotic arm built with balsa wood and servos. Not sure what will come next quite yet.
Monday, November 1, 2010
Woodrow Making Strides
After some testing and code tweaking, I was able to get Woodrow to walk forward without falling over. He still needs some work to walk straighter, but progress has been made. Since this video, I've also added control with the Wii nunchuck and started working on turning and backing up. More videos to come once that's all worked out.
Thursday, October 28, 2010
Woodrow's First Steps
Growing bored of working with wheels, I decided my next robot project should be a biped. This is much more challenging, but also much cooler. I started looking at different robot kits online and quickly came to the conclusion that they're all really expensive, like hundreds of dollars of expensive.. The one I liked most as a starter project was Lynxmotion's BRAT Jr. 
They no longer sell the Jr though, and the regular BRAT costs a little over $300 bucks for the full kit, and still $200 just for the motors and hardware without the microcontroller and board. It comes with 6 servos that go for around $12 bucks each, so if you were to remove the costs of the servos, that's still over $100 bucks just for the metal and screws! I just feel like that's a rip off and didn't feel like buying the kit (at least not for now..). I decided that I would try to build my own replica of the BRAT Jr. using my arduino for the brains and cheapo balsa wood and hot glue. Not only is it a lot cheaper, but it looks pretty cool to have a wooden robot. Here are some pics of the building process, keep in mind this is my first time ever doing anything like this..


It's definitely far from perfect, but it's a good start. I built a basic walking program from scratch and after a little tweaking, I am able to get him to move forward successfully, though quite awkwardly. It's ok, he's just learning how to walk and will hopefully improve with time and practice (and me fixing the code and adjusting the body).
Friday, October 8, 2010
Donuts the Drone
I decided to use a different base for the robot when I saw Walmart had cheap RC cars for about $10. I bought one of those, ripped the plastic top off of it, unhooked the motor wires, placed my Arduino and breadboard on top of it, and hooked the motor wires up to the H-bridge. This worked very well, all I had to do was change some code because now instead of using differential drive with 2 wheels, I was using rack and pinion steering with 4 wheels. This body is sturdier with better weight distribution, and with 4 wheels, it drives much better. A body, 4 wheels, and 2 motors for $10 bucks, not bad! Besides this reworking, I also fitted a servo motor with a wireless cam fastened on top. Using VLC, I am able to stream the live video feed from the camera onto my network. Using the VideoView control from the Android SDK, I am able to view this feed from my Droid while controlling the robot. Unfortunately, there's about a 5 second latency on the video stream on the Droid that I haven't been able to solve as of yet. I've been unable to find a solution to the problem, though others have experienced this grief as well. Anyhow, these major cosmetic changes to the robot warrant a new name for it. This new robot is named "Donuts", again thanks to Erin =)
**UPDATE** Since so many people have asked me for the code, I am sharing the Arduino and Android code here. The Arduino code is based on some older code that wasn't cleaned up so it's messy. Also, this was a good resource for me to learn how to get my Android app communicating with my Arduino via bluetooth. Thanks to all who have left comments, good luck on your projects!


**UPDATE** Since so many people have asked me for the code, I am sharing the Arduino and Android code here. The Arduino code is based on some older code that wasn't cleaned up so it's messy. Also, this was a good resource for me to learn how to get my Android app communicating with my Arduino via bluetooth. Thanks to all who have left comments, good luck on your projects!


Wednesday, September 29, 2010
Lemons v1.3, now Bluetooth enabled and with a horn!
I decided to bump up the version number by 0.2. 0.1 for adding remote control via Bluetooth, and 0.1 for having a kick ass horn! I added a Bluetooth serial modem to Lemons that can be purchased at SparkFun. Getting it to pair with my laptop was no problem, and I was quickly able to add code to Lemons that can listen for commands via serial. This resulted in a simple but fun start to remote control where I would type a key like 'w', and Lemons would move forward for one second. My goal was to have something more responsive however, and I wanted to have it on my Droid. So, I wrote my first Android application. I found this link to be quite helpful in setting Bluetooth up on the Android side. I wanted to have a touch screen interface that reminded me of the old remote controls I used to use for my RC cars when I was a kid. My plan was to simulate those vertical and horizontal joysticks using sliding seekbars, one horizontal and one vertical. Unfortunately, the Android SDK does not come with a vertical seekbar, but I found one on Google Groups that worked nicely. I also added buttons to toggle the lights on and off and to beep the newly added piezo buzzer I mounted towards the front of Lemons. My next step is to add a camera to Lemons and have the video feed back to my Droid.
Subscribe to:
Posts (Atom)